
Configure OTA URL
Edit the ESP32 firmware to point its OTA URL at the Assistant Core server.
Assistant Core already provides ready-to-flash firmware for your device (see Flash Firmware). This page is for when you want to build your own firmware instead of using the ready-made one.
The Assistant Core server is fully compatible with the open-source Xiaozhi ESP32 firmware and the many Xiaozhi-based firmwares on the market. You only need to point the firmware's OTA URL at your Assistant Core server. This is the endpoint the device calls on boot to fetch its configuration, system time, realtime connection info, and activation code — not just firmware updates.
If the OTA URL is wrong, the device cannot fetch its configuration and will not start a voice session, even if the firmware flashed successfully.
Prerequisites
- ESP-IDF v5.3+ installed (see ESP-IDF Getting Started)
- A USB cable connected to your ESP32-S3 device
Clone the Xiaozhi firmware source and run the commands below from inside the cloned folder:
git clone https://github.com/78/xiaozhi-esp32.git
cd xiaozhi-esp32
Steps
1. Initialize the ESP-IDF Environment
get_idf2. Set the Target Chip
idf.py set-target esp32s33. Open Menuconfig
idf.py menuconfig4. Edit the OTA URL
Go to AssistantCore Assistant → select the Default OTA URL line, press Enter, and type your server URL. Press S to Save and Q to quit.
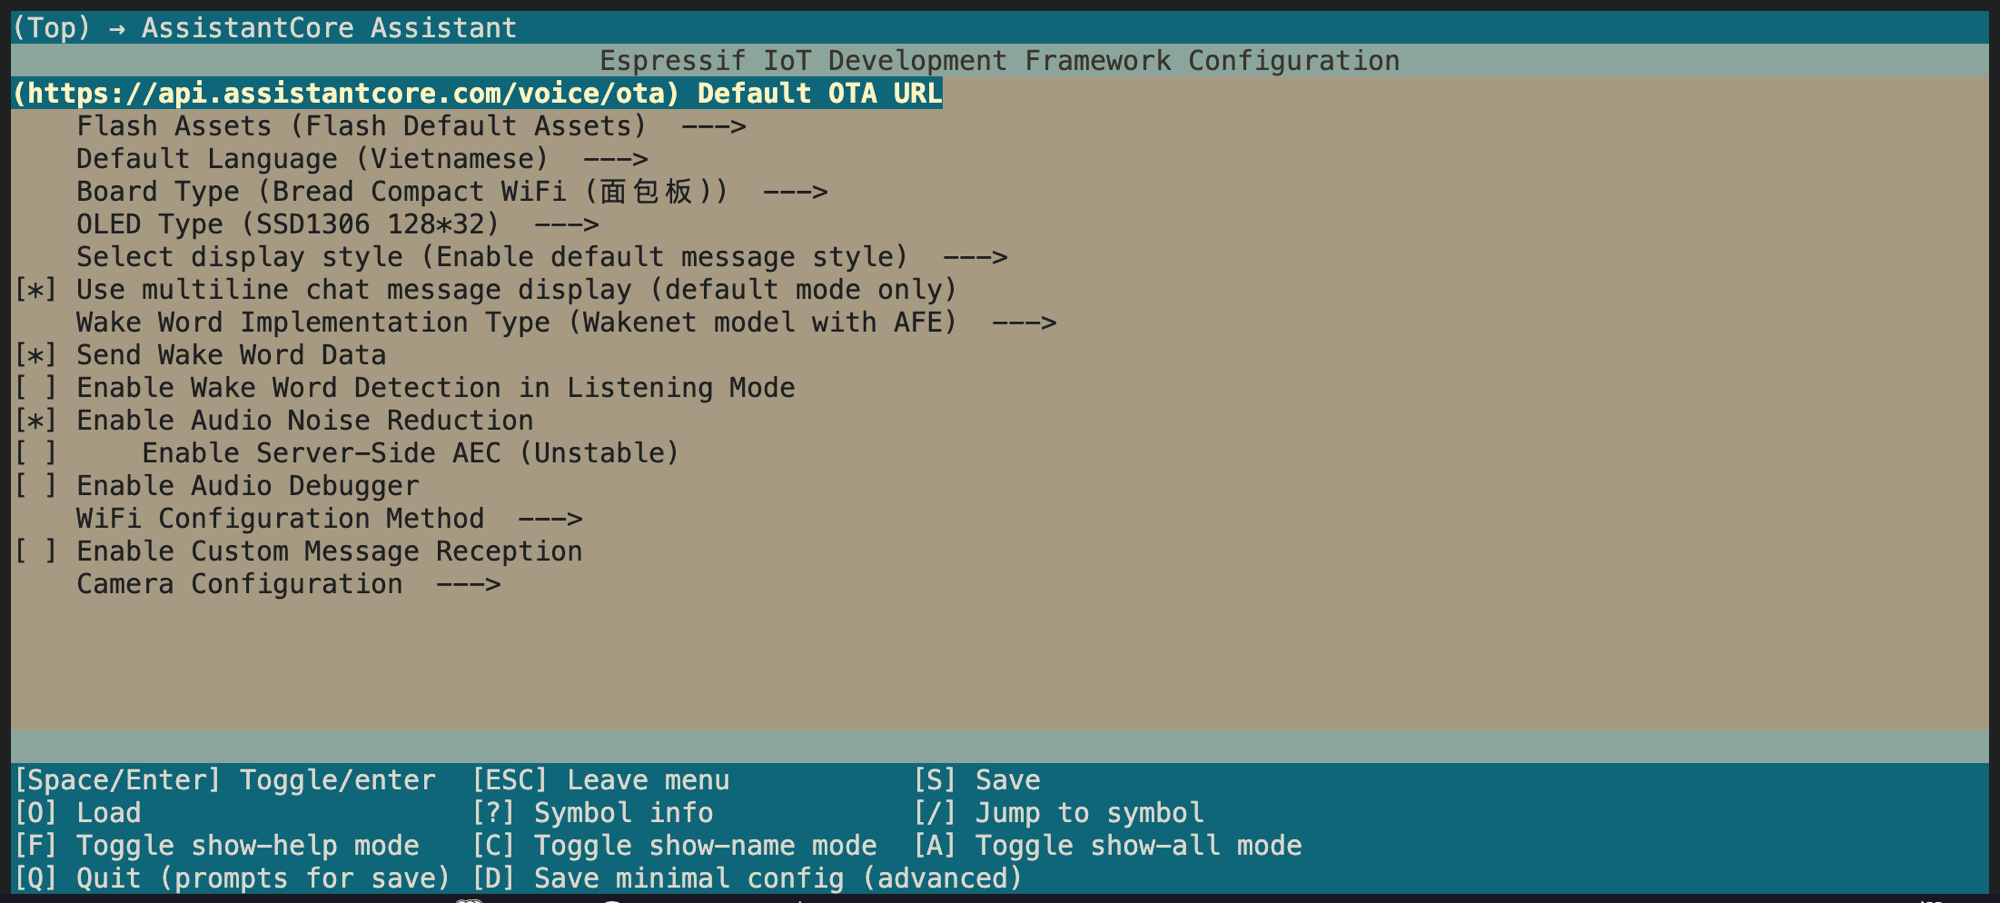
In the AssistantCore Assistant menu, set Default OTA URL to point at your Assistant Core server.
Enter your Assistant Core server URL in the format https://<your-server-domain>/voice/ota. For the hosted platform, the value is:
https://api.assistantcore.com/voice/otaWhile in the AssistantCore Assistant menu, also confirm the Board Type matches your hardware before building.
5. Build the Firmware
idf.py build6. Flash & Monitor
idf.py flash monitorPress Ctrl+] to exit the serial monitor.
If the serial port isn't detected during flashing, put the device into Download Mode: hold BOOT, press and release RST, then release BOOT and flash again.
Verify
After flashing, open the serial monitor and watch the boot logs: the device will call the OTA URL you configured. On a successful connection, the device receives its configuration and (if not yet linked) shows an activation code to enter in the Admin Panel.
Then continue with Register Device.